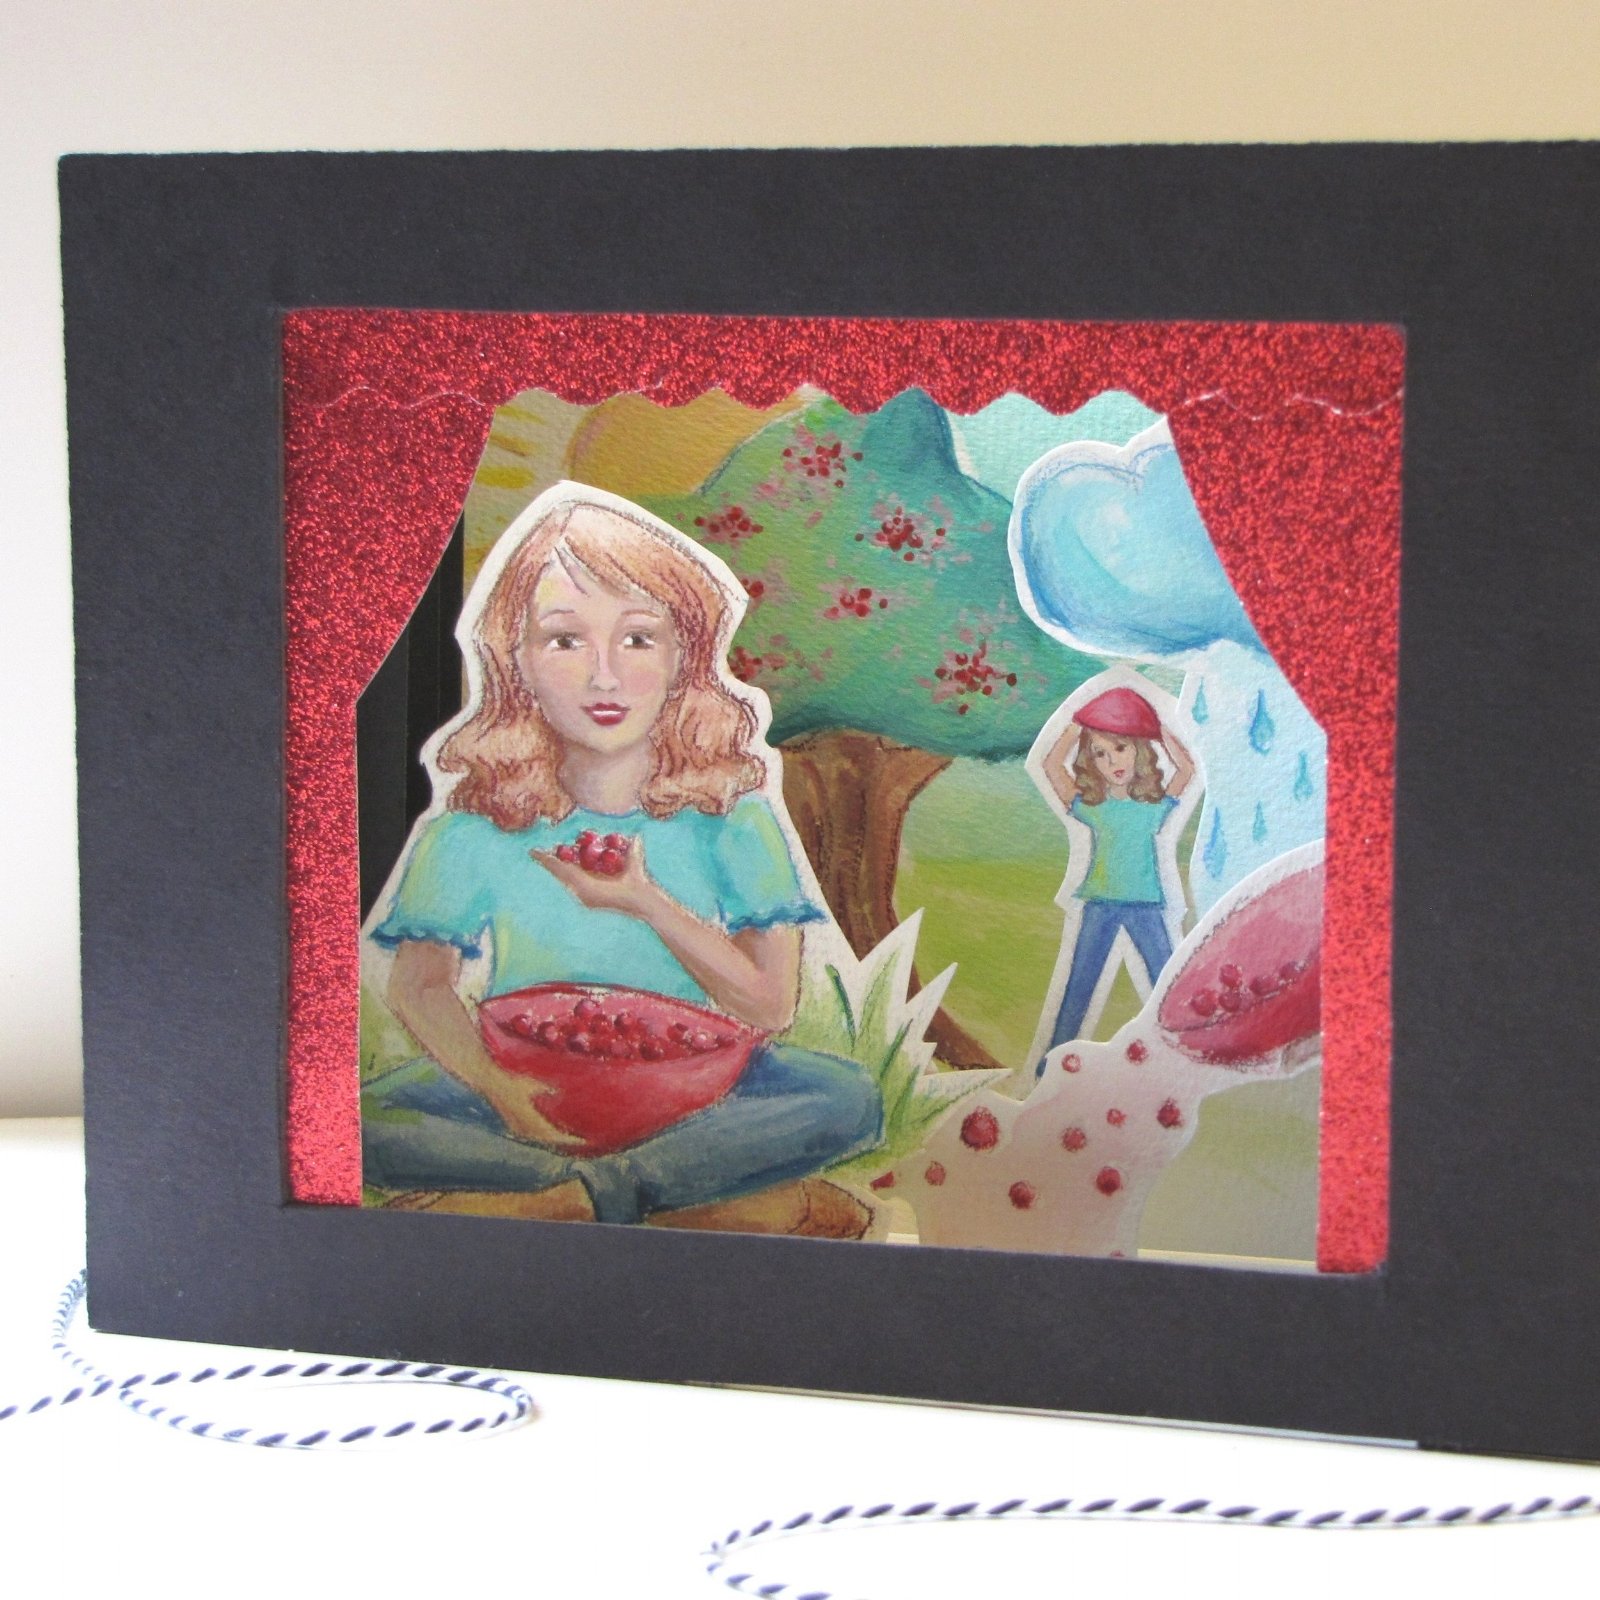
Tunnel Book Project

Here's a nifty project I shared with students at the Prelude Chamber Music Camp. This, my curious friends, is a Tunnel Book, and it's my first time making something like this. I've seen a few creations on this theme and they're really inspiring. I love the idea of condensing a story down to it's basic elements, and telling it visually on a small stage just stirs my inner Broadway director. It teaches story writing in a fun way, so it's great for kids—and it's great for grown ups too! Such a clever way to dress up a bookshelf with original art.
If you'd like to make this yourself, or with kids, it's best to separate the painting time from the construction time. The drawing & painting is primarily a right brained activity, tapping into creativity, colors, etc. The construction, on the other hand, requires math, measurement, and more left brained thinking. The entire project crosses over, for whole brain learning, which is one of the things I love about it, but many people will find it more enjoyable to take a small break in between. In my opinion, it's best to start with the framework.
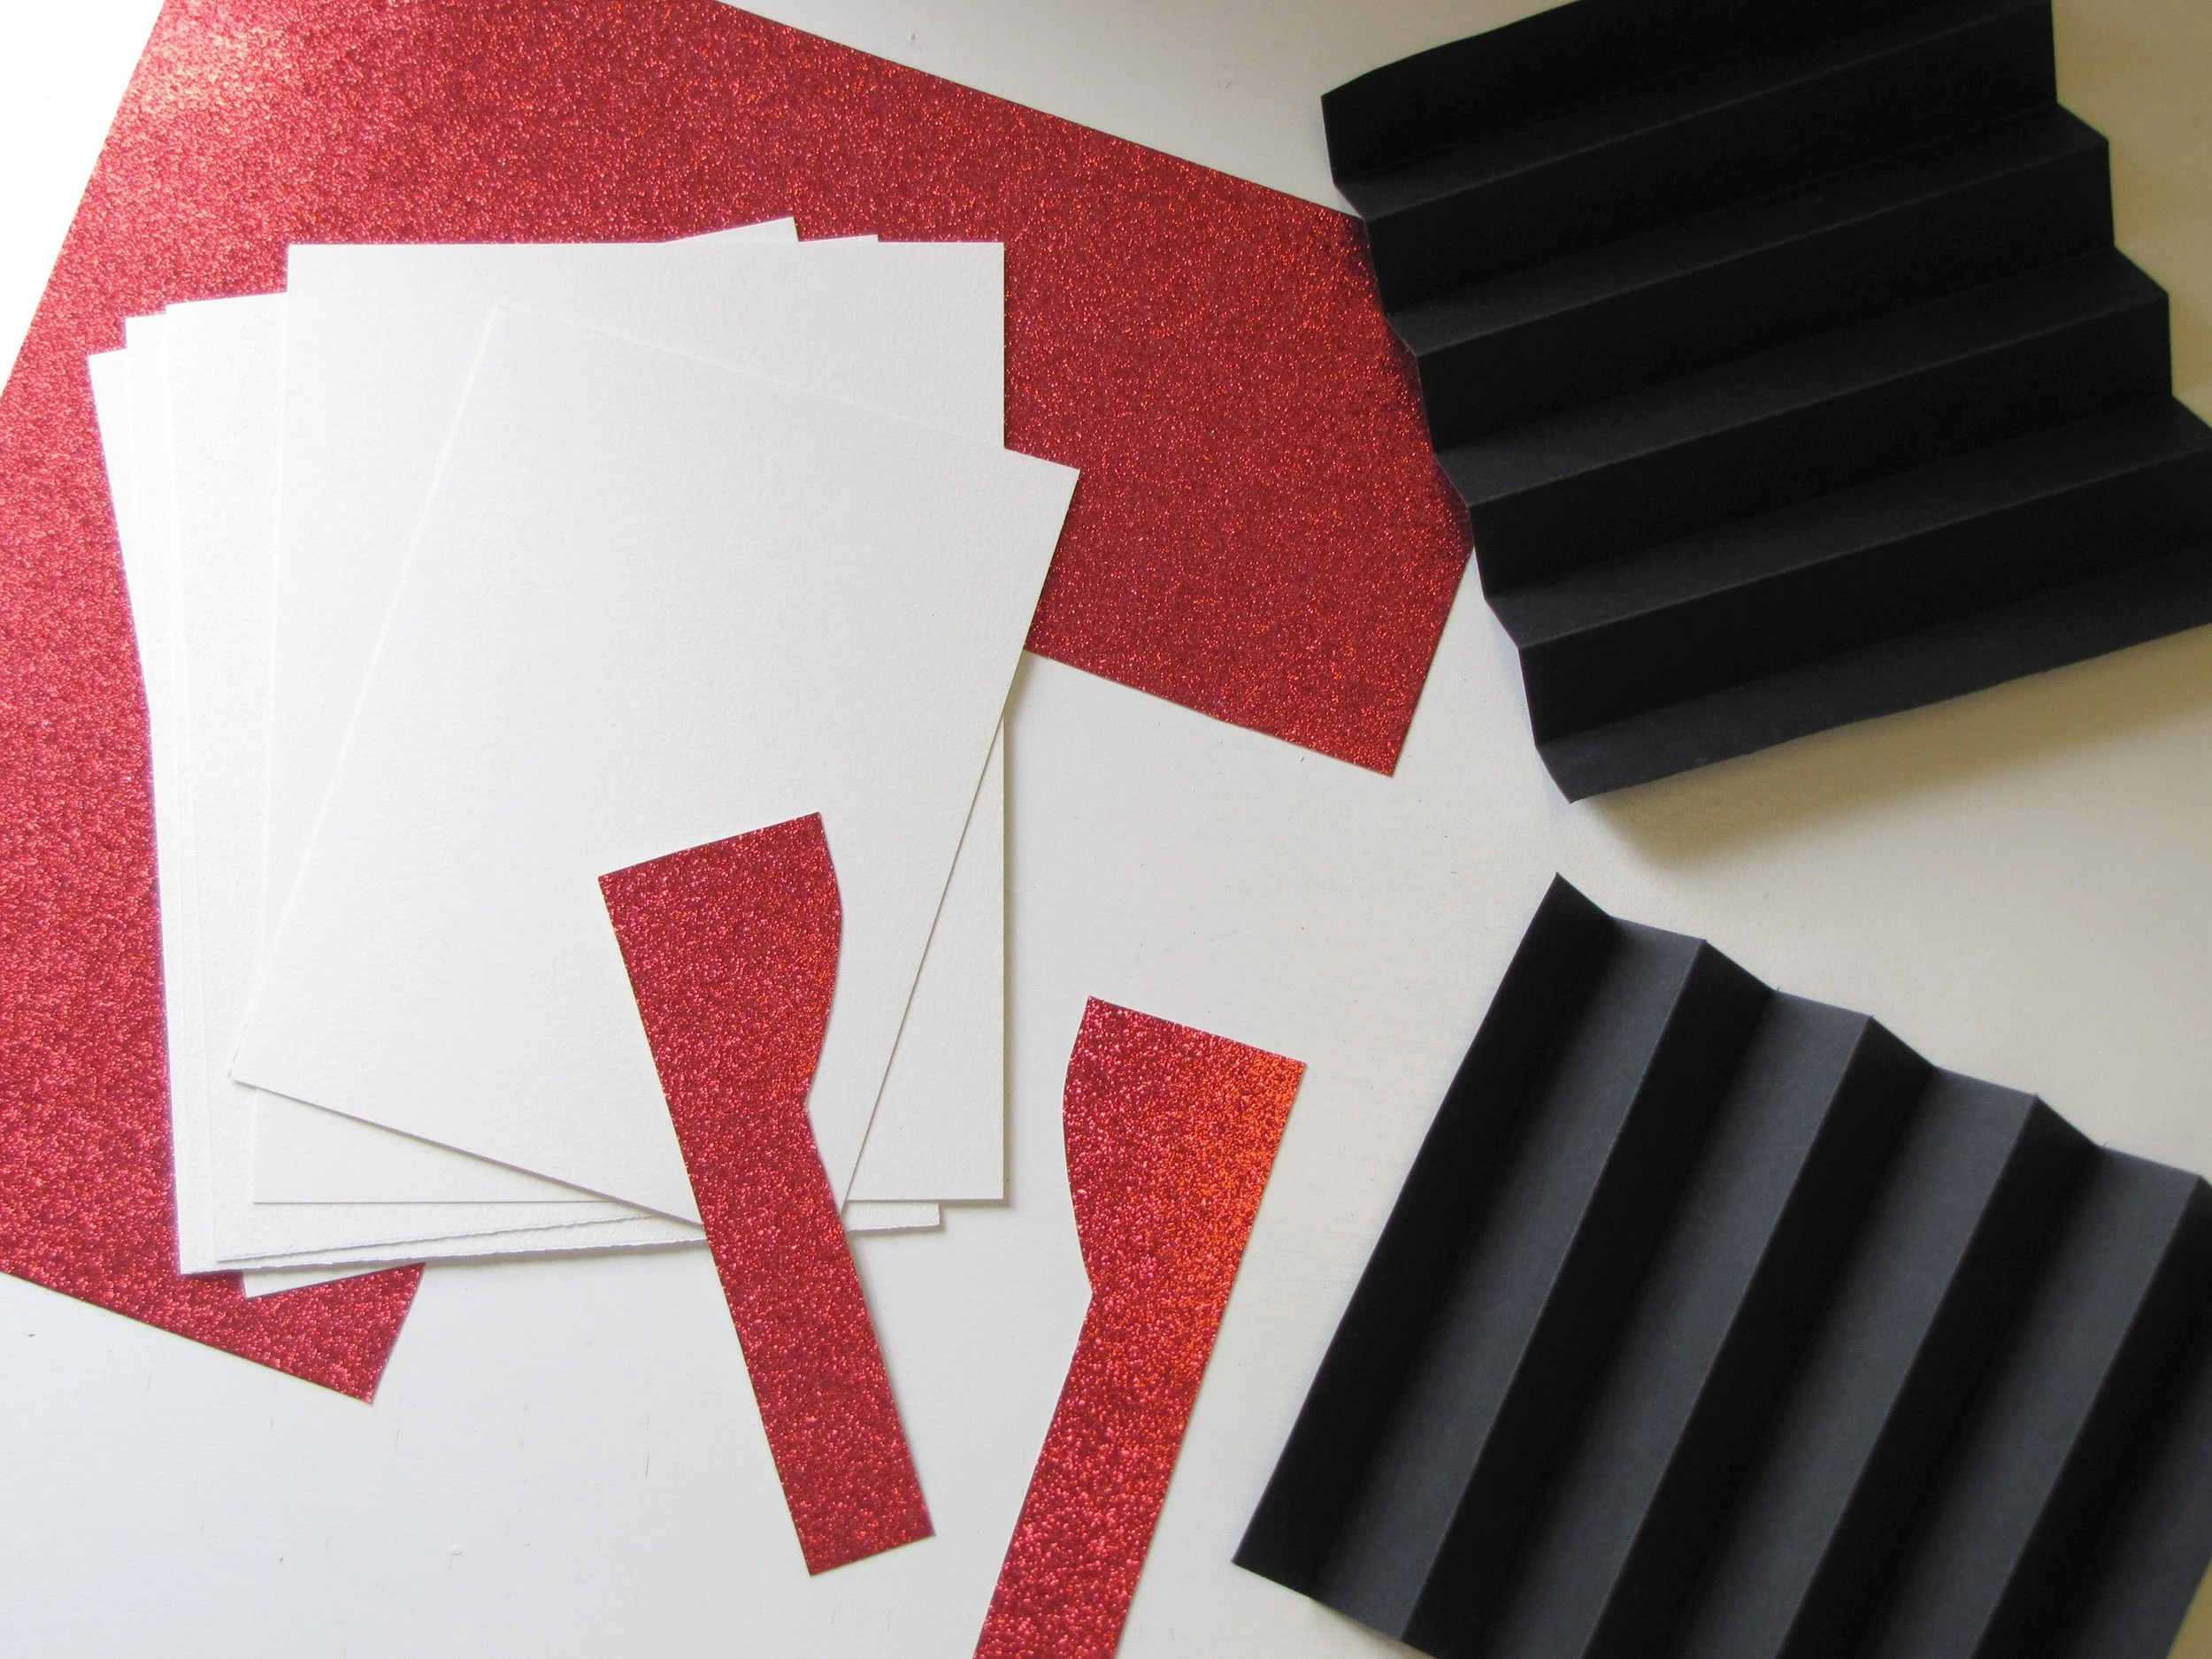

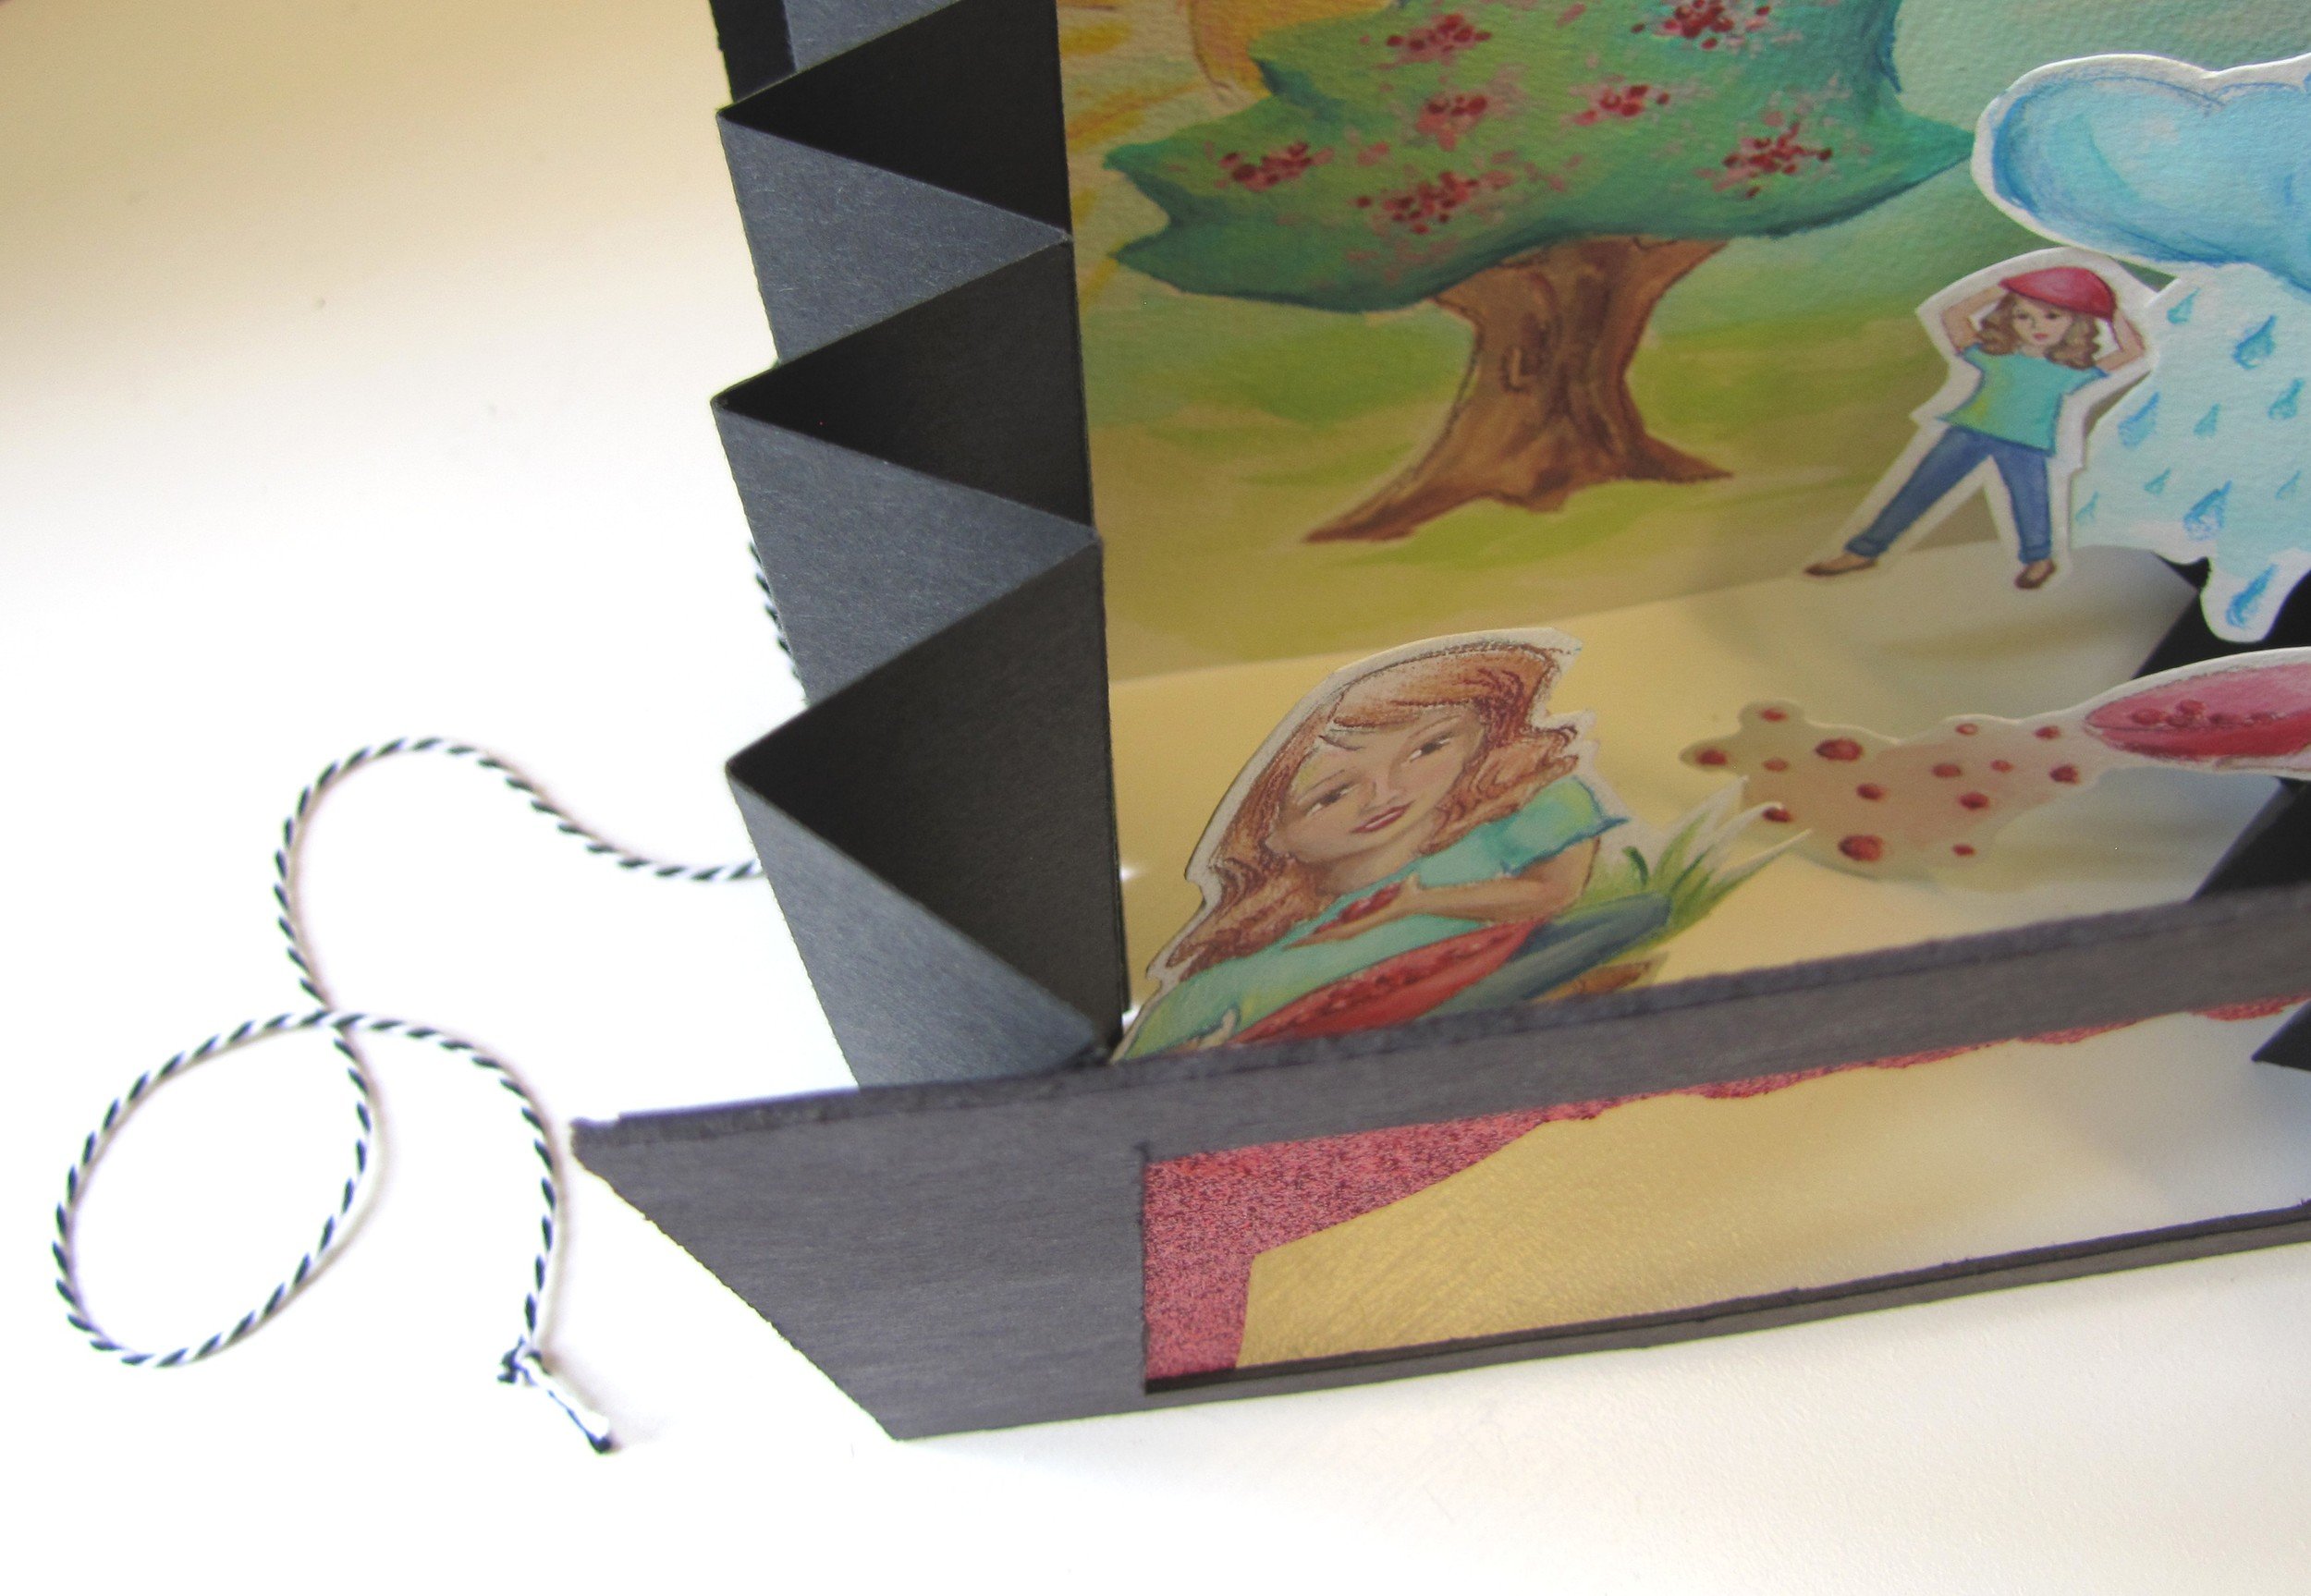
To make the sides, cut two 6" x 10" rectangles of black poster board. Measure and make marks at 1" increments across the top and bottom of each piece. Line a ruler up with top & bottom marks and score with scissors. Repeat this process at every inch, and then fold in an accordion fashion. The mat board makes the main frame. It's pretty tough to cut, so please be careful. This part should only be done by adults. You'll need a sharp box cutter, and a good protective material to place between the mat board and your table. I did this on the floor with a thick piece of hard cardboard as my buffer. Best to do a test cut too, to make sure the blade doesn't cut through and scratch anything important. Draw a 6" x 8" square with a pencil and cut, using the side of the ruler for a straight edge. Then, measure in 1" from the top, 1" from the bottom, and 3/4" from each side to draw a 4.5" x 6" rectangle. Cut along these lines in the same way to create the opening. This is really the hardest part of the project, so when you're done, you can say "Whew! Next are the curtains, and you can make these any shape and size you like. Just be sure you leave enough space open to see what's on the stage. I used glitter card stock for this, but many things will work. Feel free to get creative! Mount curtains to the back of the main frame with a glue stick and hold with clips until dry.
Milk & cookie break.
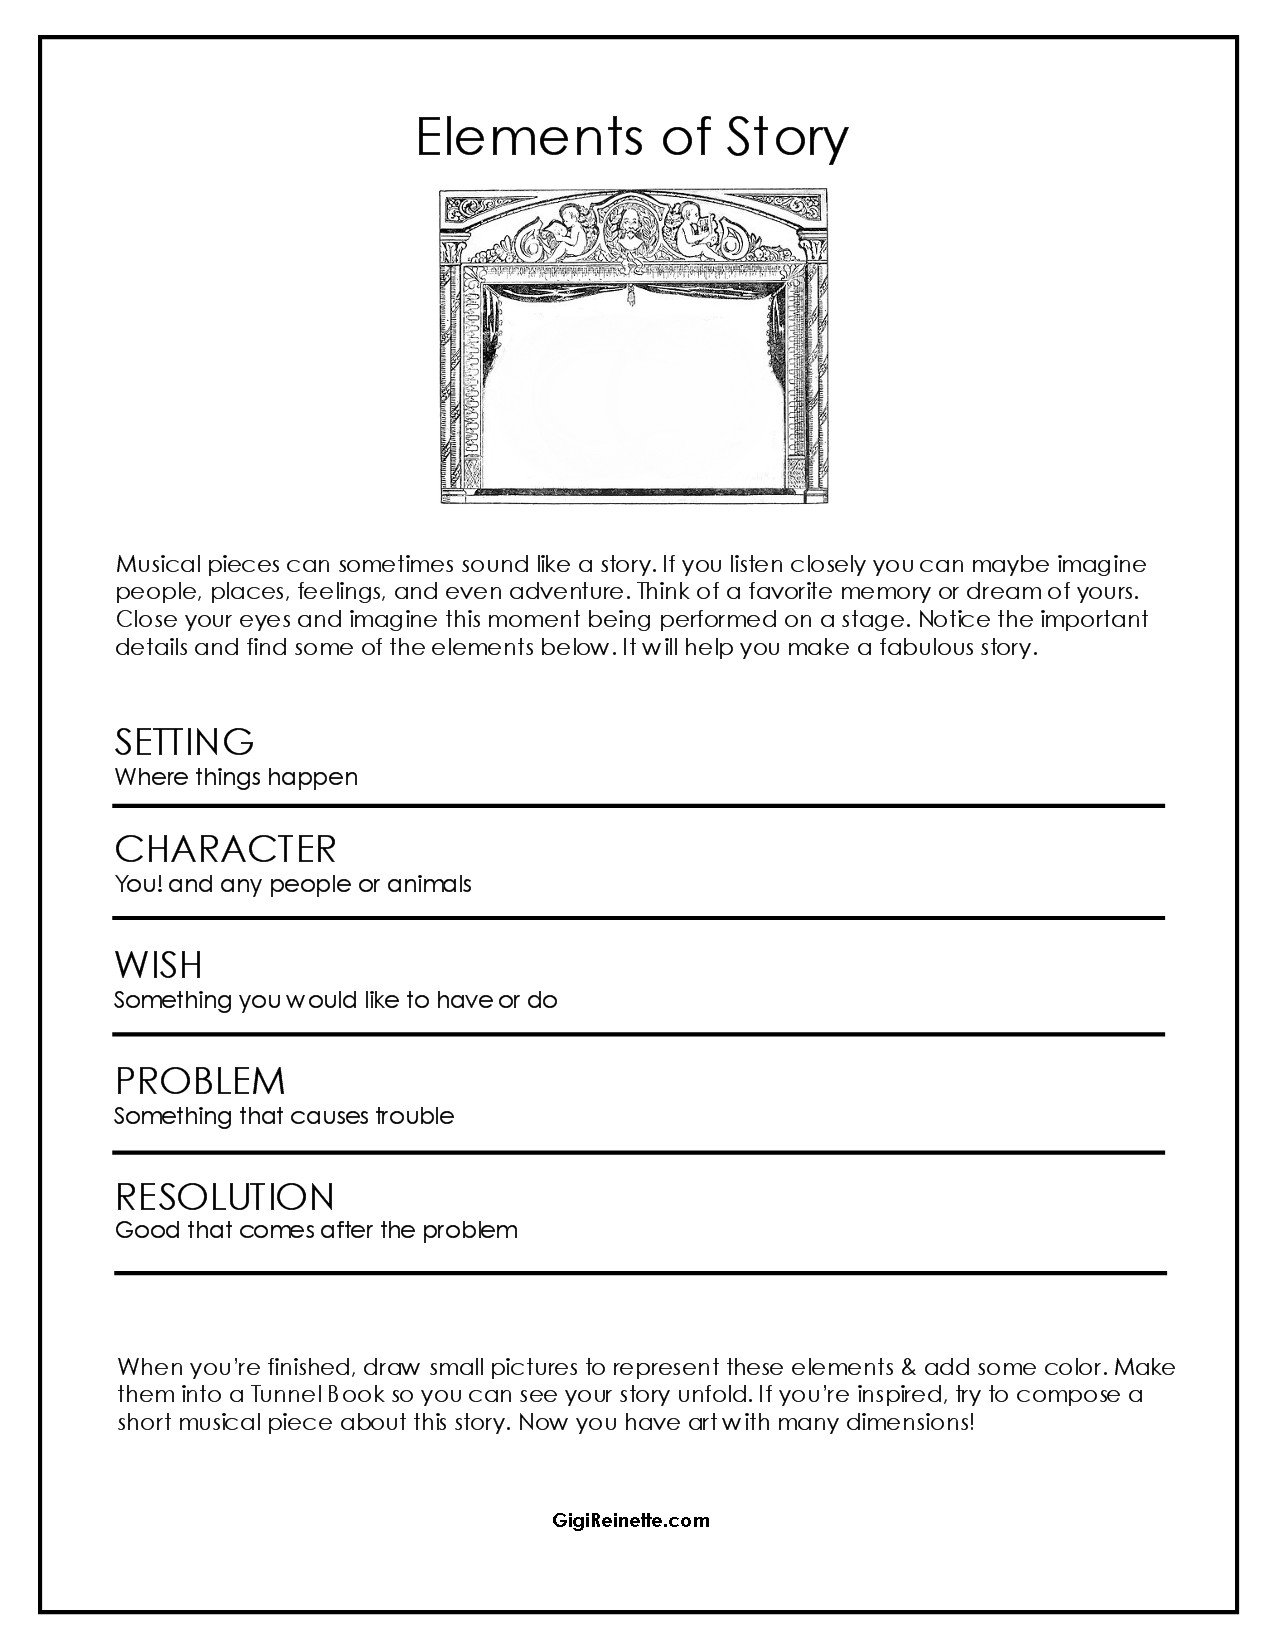
Now, for the painting! Think of a story you want to tell and the visual symbols that comprise it. You can use the worksheet I created for the class, if you'd like. It provides some basic guidelines. Once you've decided on your symbols, draw them lightly with pencil on heavy weight watercolor paper. Use your imagination or photo reference if you need to, just be sure to make them small enough to share the stage with each other. When you're happy with your drawings, add some color. I used colored pencil and acrylic paint, but if your paper is durable enough, you can use many mediums. When you're finished, cut around your paintings and glue them to the accordion sides of your book. For your last piece, cut a 6" x 8" rectangle of the same watercolor paper and paint your Happy Ending! Glue and hold with clips until dry. Now, you can peer through the front and experience your story in all it's glory. For a final touch, you can add a string closure. Great for storing it flat or giving as a gift.

Below is a list of materials and tools we used. I've also attached the worksheet I made for the class. You're free to download it for use in personal or classroom settings. Enjoy! And please stay tuned... my next post recaps our week at the awesome Prelude Chamber Music Camp!
black mat board
black poster board
red glitter cardstock
scissors
box cutter (grown-ups only please)
ruler with metal edge
acid free glue stick
small binder clips or paper clips
black & white swirly string
heavy weight watercolor paper
pencil & colored pencils
acrylic paints & water